Create New Queue
Creating an Amazon SQS queue is the first step in setting up your integration with Nayax.
Select AWS Region
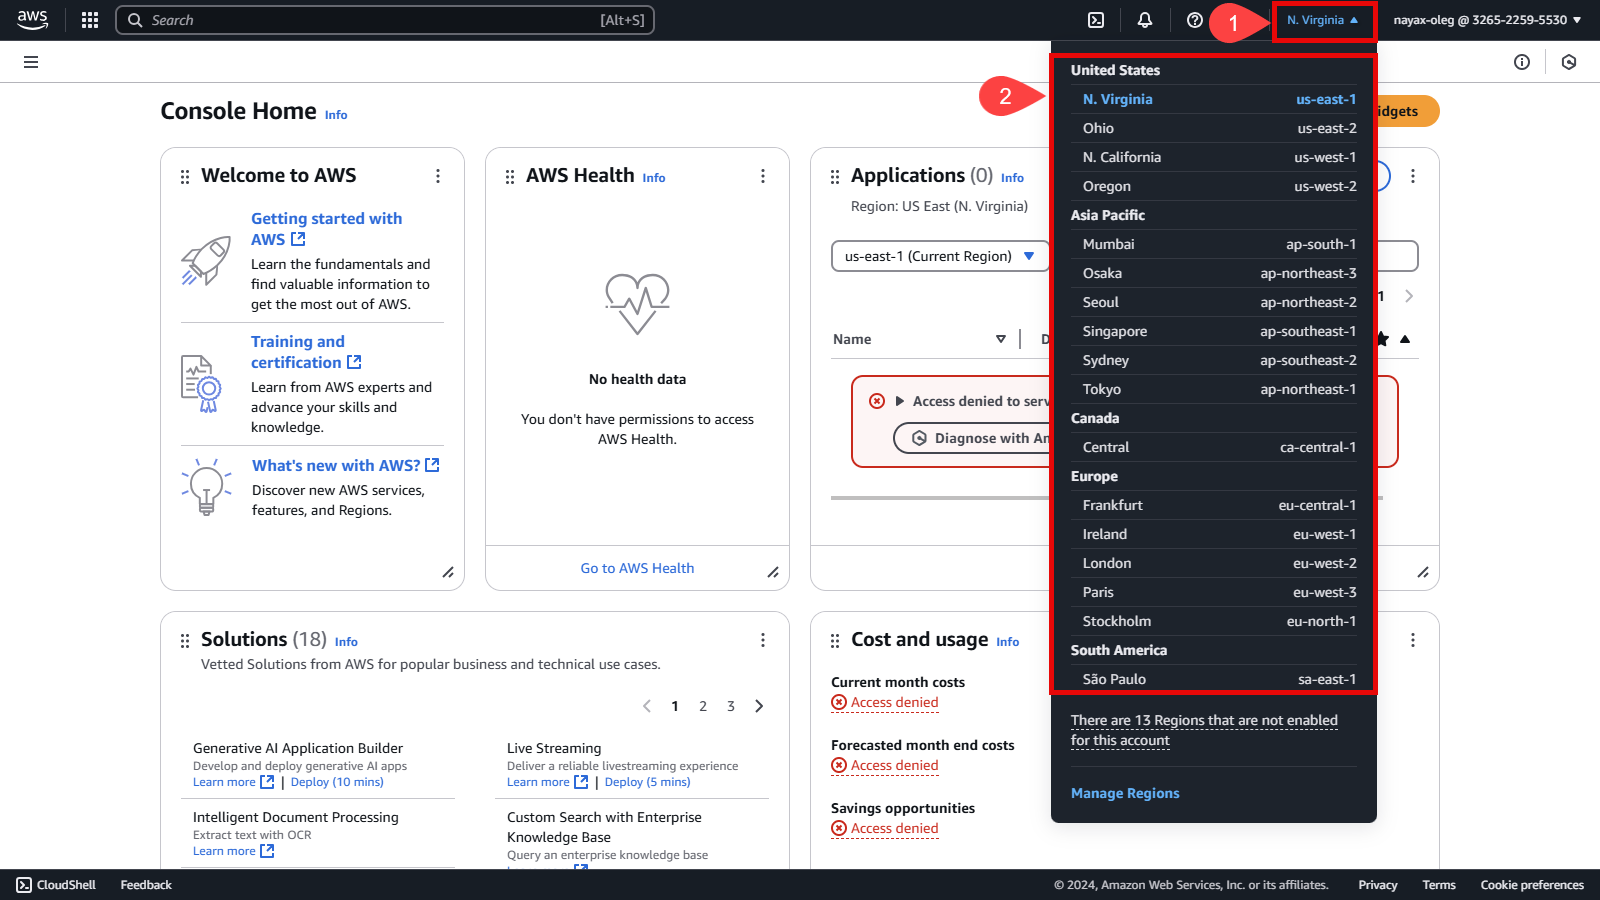
Once the prerequisites are complete, you can proceed to select the AWS region where your queue will be created.
- Go to the top-right corner of the AWS console.
- Select the region where you will create the queue.
Region pricing and latency
It's important to note that the region you select will affect the pricing and latency.
Create a Queue
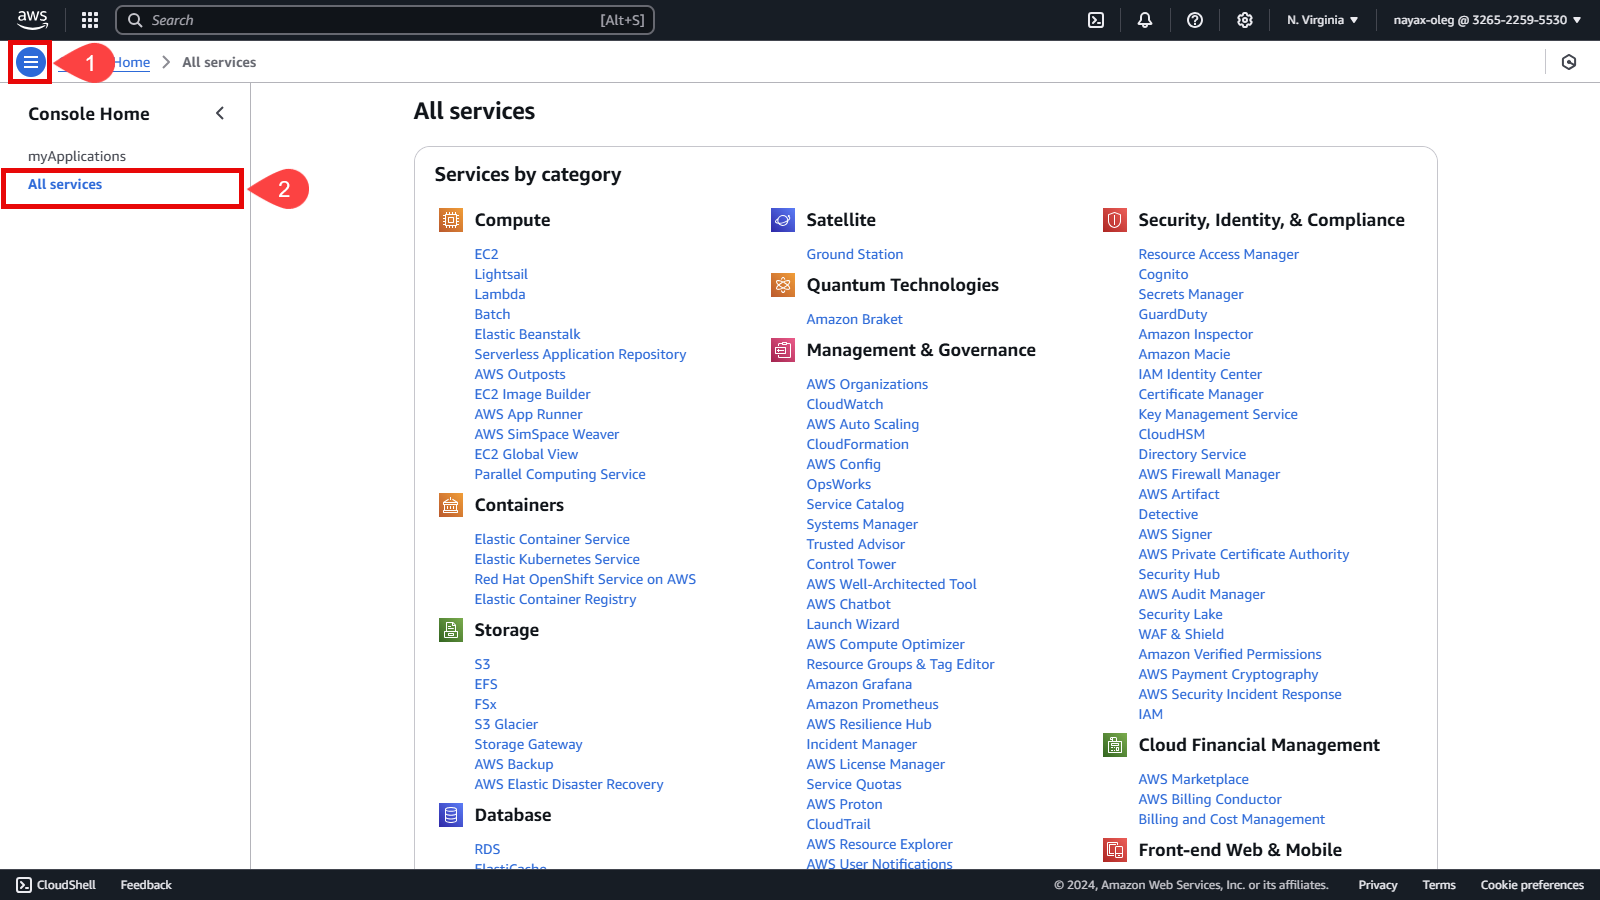
Now that you’ve selected a region, the next step is to create a new queue.
-
Click the three lines icon located in the upper left corner of the AWS console.
-
Select the All services option.
-
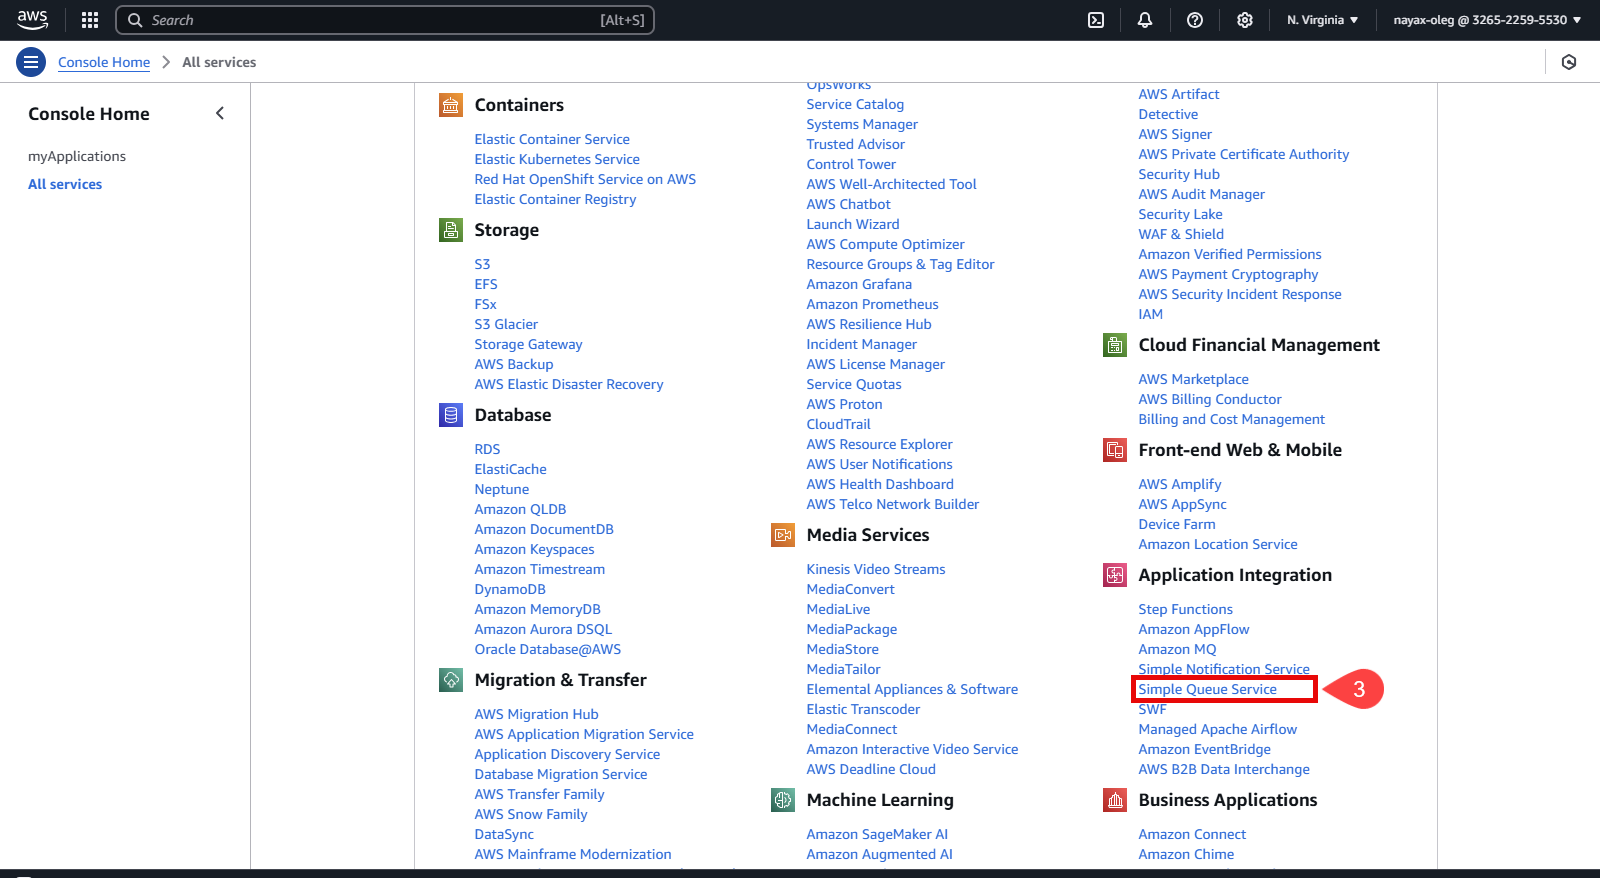
Search the Application Integration category and select Simple Queue Services (SQS).
-
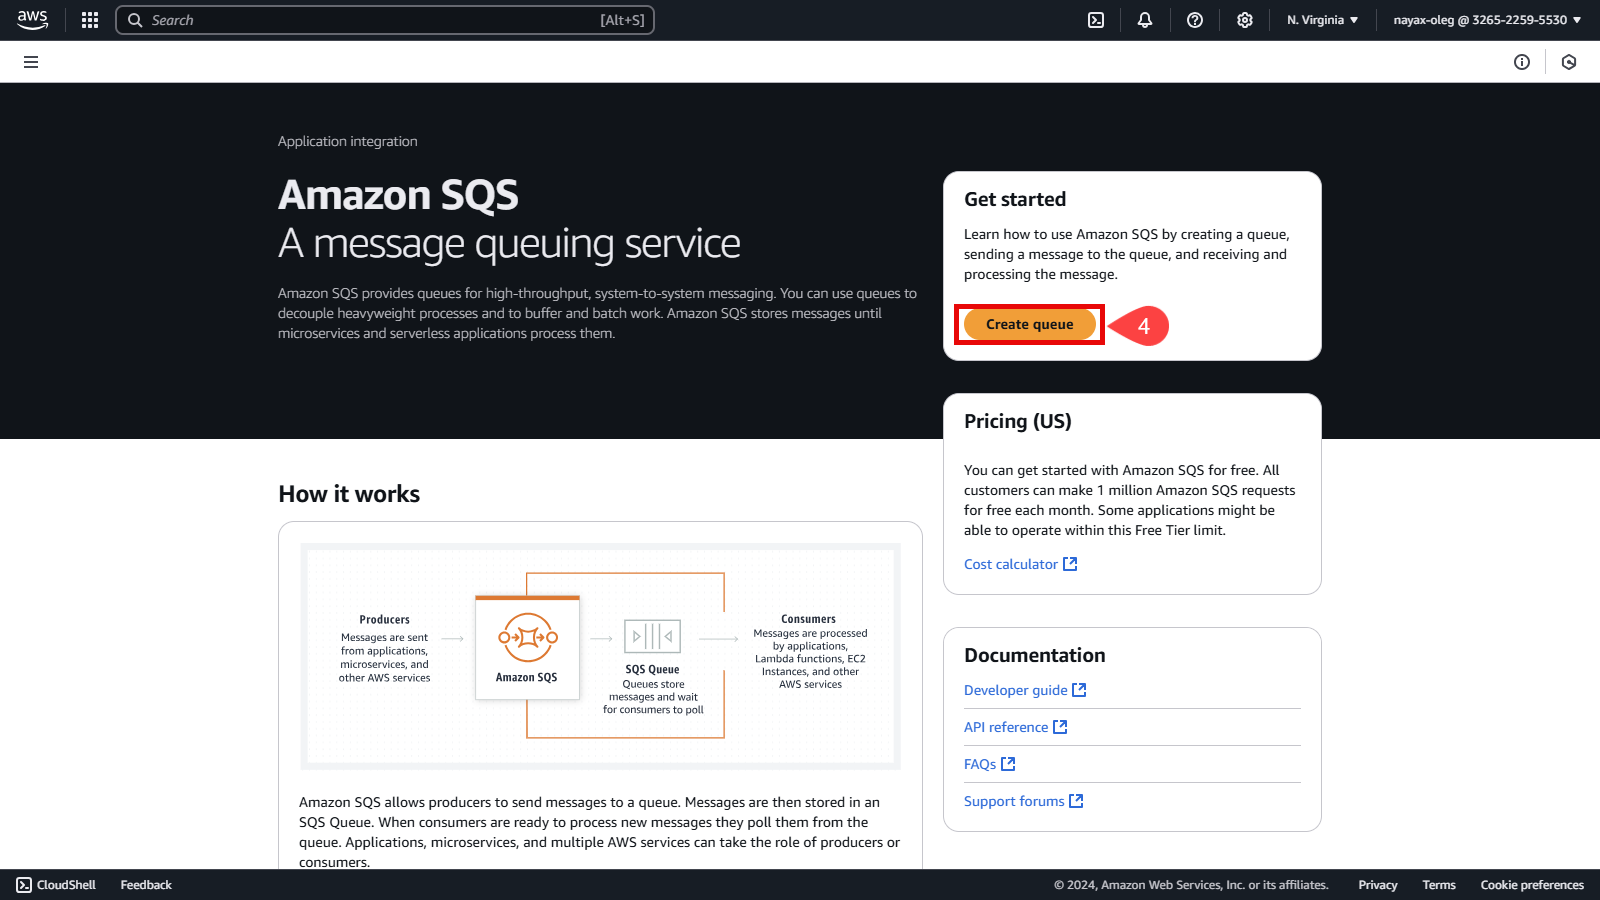
Then, click Create Queue.
-
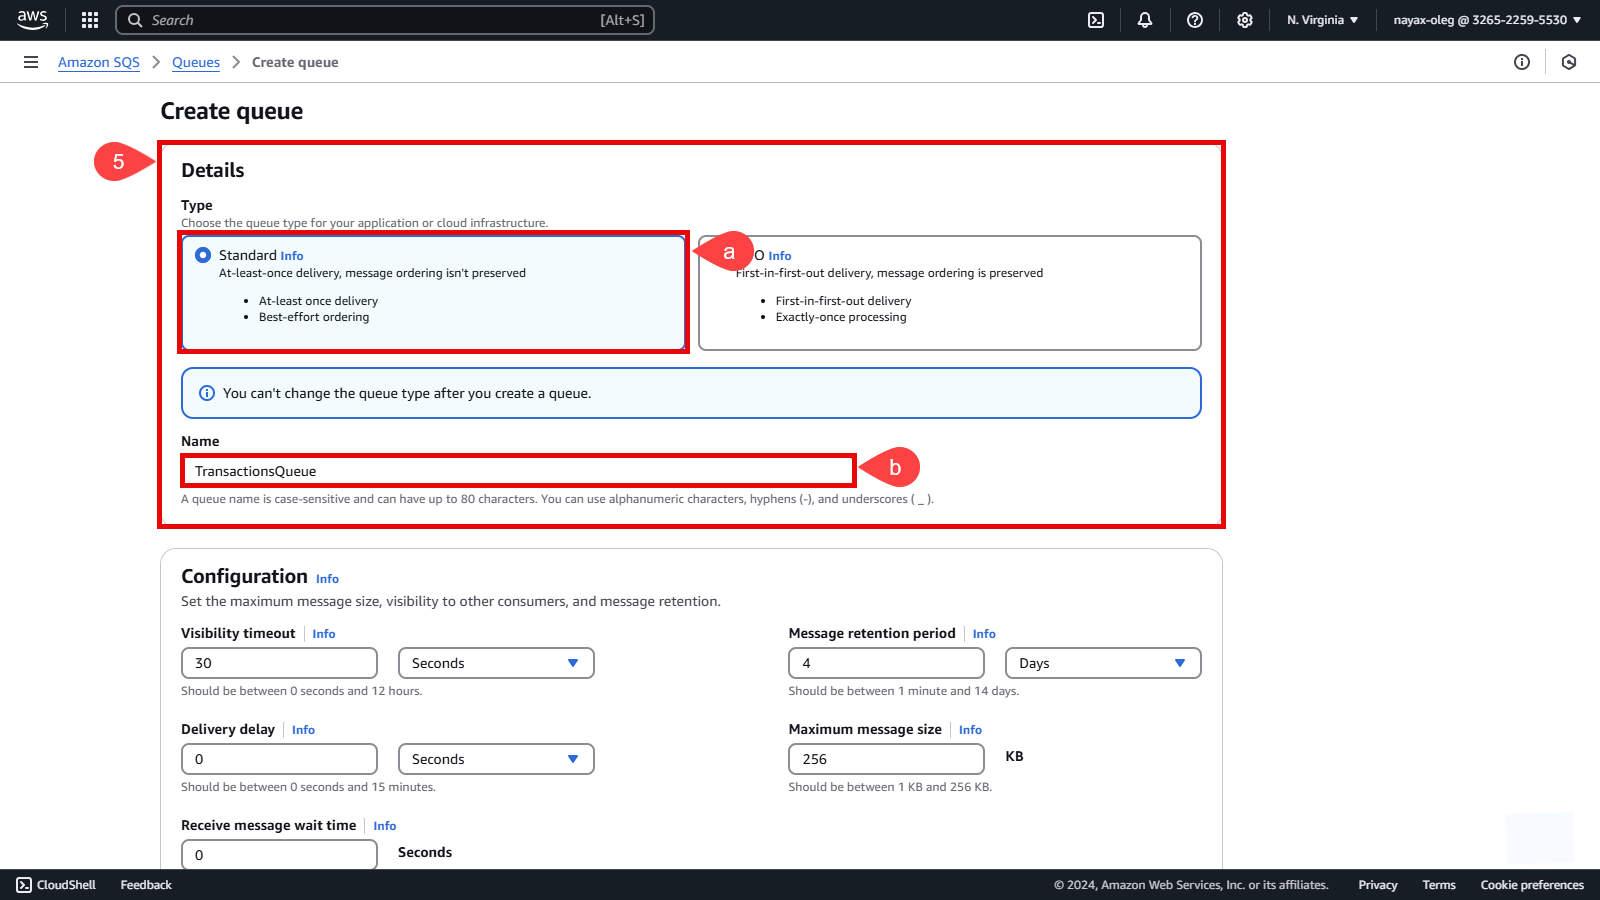
In the Details section: a. Select Standard as the queue type. b. Enter a unique name for your queue.
-
Configure the additional sections based on your needs:
- Configuration: Define basic settings for the queue.
- Encryptio: Secure your queue messages with encryption.
- Access policy: Set permissions for accessing the queue.
- Redrive allow policy (Optional): Enable or disable policies for message redriving.
- Dead-letter queue (Optional): Configure a queue for undeliverable messages.
- Tags (Optional): Add tags to categorize and manage your queue.
Optional Sections
Optional sections such as Redrive allow policy, Dead-letter queue, and Tags should be filled in based on your specific requirements. They help customize your queue's functionality and management.
-
Click the Create Queue button.

Once the queue is successfully created, a confirmation message will appear on the screen along with the Queue URL and ARN (Amazon Resource Name). Copy these values, which will be needed for integration and permissions setup in subsequent steps.

Updated 6 months ago